Bioactive Substrate: DIY Soil Mix & Cleanup Crew
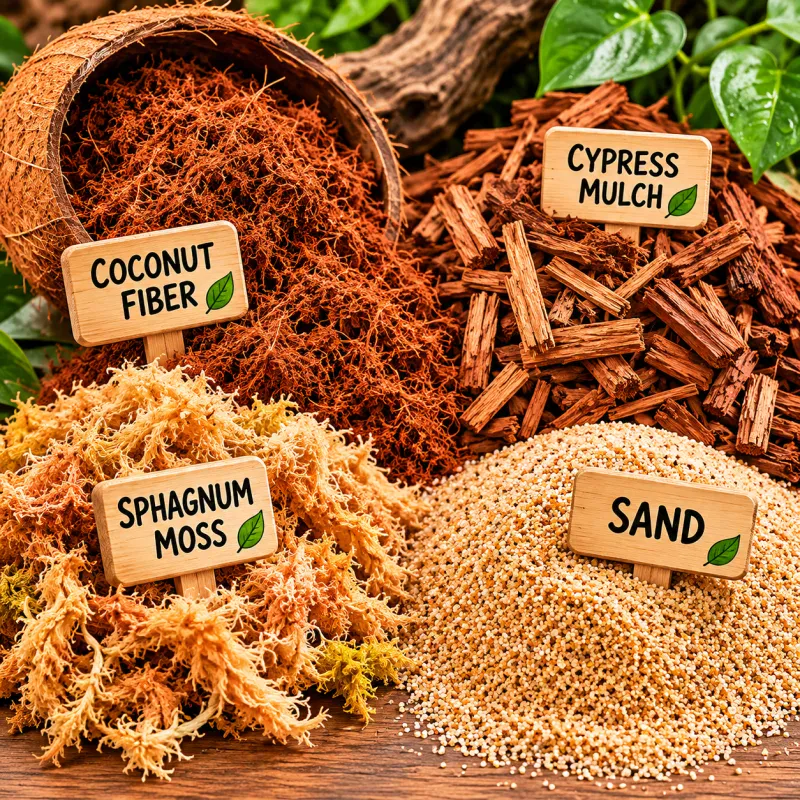
Introduction to Bioactive Substrates
A bioactive substrate is a living ecosystem within a vivarium that mimics natural soil processes. It includes a drainage layer, a soil mix, and a cleanup crew (isopods, springtails) that break down waste, aerate the soil, and cycle nutrients. This guide covers everything you need to create a self-sustaining substrate for tropical (high humidity) or arid (low humidity) setups. Unlike sterile substrates, a bioactive setup actively processes organic waste, reducing the need for frequent full cleanouts and providing a more natural, enriching environment for your reptile.
Why Go Bioactive?
Bioactive substrates offer several key benefits:
- Self-cleaning: The cleanup crew converts waste into usable nutrients, reducing ammonia buildup and odors.
- Natural behavior: Reptiles can dig, burrow, and forage as they would in the wild, promoting physical and mental health.
- Plant support: Live plants thrive in a nutrient-cycling substrate, creating a lush, naturalistic habitat.
- Long-term savings: With proper maintenance, a bioactive substrate can last 2–5 years without full replacement, saving money and effort.
Understanding the Three Layers
A successful bioactive substrate relies on three distinct layers:
- Drainage layer – Prevents waterlogging by allowing excess water to collect below the soil.
- Soil mix – The main growing medium and habitat for the cleanup crew.
- Leaf litter – Provides food and shelter for isopods and springtails, and mimics the forest floor.
Each layer plays a critical role in maintaining the health of the ecosystem.
DIY Soil Mix Recipes
The foundation of any bioactive substrate is the soil mix. The right blend depends on whether your vivarium is tropical (high humidity) or arid (low humidity). Below are two proven recipes.
Tropical Bioactive Mix
For high-humidity species (e.g., dart frogs, crested geckos, tree frogs), use a moisture-retentive blend:
- 40% organic topsoil (no fertilizers or perlite)
- 30% peat moss or coco coir
- 20% sphagnum moss (for moisture retention)
- 10% horticultural sand or fine pumice (for drainage)
- Add 1-2 cups of leaf litter per gallon of mix
Step-by-Step Mixing Instructions:
- Choose a large, clean container (e.g., a plastic tub) and wear gloves.
- Measure each component by volume using a bucket or measuring cup.
- Mix the topsoil and peat/coco coir thoroughly first to ensure even distribution.
- Add the sphagnum moss, breaking up any large clumps.
- Incorporate the sand or pumice slowly, mixing until the texture is uniform.
- Moisten the mix with dechlorinated water until it holds together when squeezed but does not drip. Aim for a consistency like a wrung-out sponge.
- Add the leaf litter and mix gently to distribute.
Why These Ingredients? Topsoil provides the base mineral content and structure. Peat or coco coir holds moisture and slightly acidifies the soil (ideal for tropical species). Sphagnum moss retains water and creates microhabitats. Sand or pumice ensures drainage and prevents compaction.
Arid Bioactive Mix
For desert species (e.g., leopard geckos, bearded dragons, uromastyx), use a fast-draining blend:
- 50% organic topsoil
- 30% play sand (washed, no silica dust)
- 20% decomposed granite or fine gravel
- No peat moss or sphagnum (keeps humidity low)
- Add 1/2 cup of crushed limestone or calcium carbonate for arid species that need calcium
Step-by-Step Mixing Instructions:
- In a large container, combine the topsoil and play sand.
- Add the decomposed granite or gravel and mix thoroughly.
- If using, add the crushed limestone or calcium carbonate and stir well.
- Do not add water; the mix should remain dry and loose.
- Test drainage by pouring a small amount of water – it should pass through quickly.
Why These Ingredients? Topsoil provides a stable base, while sand and granite create large pore spaces for rapid drainage and aeration. The absence of organic moisture-holders keeps humidity low, preventing respiratory issues in arid species.
Customizing Your Mix
You can adjust these recipes based on your specific species and environment:
- For burrowing species: Increase the sand/gravel proportion to 40–50% to make the mix looser.
- For tropical species that need extra moisture: Add 5–10% more sphagnum moss.
- For species that require higher pH: Add crushed oyster shell or limestone (as noted for arid mixes).
Drainage Layer Setup
A drainage layer prevents waterlogging and root rot. For tropical vivariums, use 1–2 inches of LECA (lightweight expanded clay aggregate) or hydroton at the bottom. Cover with a sheet of fiberglass window screen or landscape fabric to separate soil from drainage. For arid vivariums, skip the drainage layer or use a thin layer of coarse gravel (0.5–1 inch) if you occasionally mist.
Step-by-Step Drainage Layer Installation
- Clean the vivarium thoroughly with a reptile-safe disinfectant and rinse well.
- Add the drainage material (LECA for tropical, gravel for arid) evenly across the bottom. Aim for the recommended depth.
- Cut a piece of fiberglass window screen or landscape fabric to fit the entire bottom, overlapping the edges by at least 1 inch.
- Place the screen over the drainage layer, tucking it against the glass walls. This prevents soil from falling into the drainage layer.
- Add a thin layer of activated carbon (optional) on top of the screen – this helps filter water and reduce odors.
- Add your soil mix on top of the screen, building it to the desired depth (typically 2–4 inches for most setups, more for burrowing species).
Why a Drainage Layer Matters
Without a drainage layer, water can pool at the bottom of the soil, creating anaerobic (oxygen-free) conditions. This leads to root rot, harmful bacteria growth, and the production of toxic gases like hydrogen sulfide. The drainage layer allows excess water to collect away from the roots and can be siphoned out during maintenance.
Drainage Layer Maintenance
For tropical setups, check the drainage layer weekly and siphon out any standing water using a turkey baster or small pump. This prevents stagnation and keeps the ecosystem healthy.
Cleanup Crew Selection
Cleanup crew organisms are the heart of a bioactive substrate. They consume waste, aerate the soil, and recycle nutrients. Choosing the right species for your environment is critical.
| Species | Role | Tropical | Arid |
|---|---|---|---|
| Springtails (Collembola) | Eat mold, fungus, and decaying matter | Yes | Yes (dry-tolerant species) |
| Dwarf White Isopods (Trichorhina tomentosa) | Break down leaf litter and waste | Yes | No (need moisture) |
| Powder Blue Isopods (Porcellionides pruinosus) | Fast-breeding, tolerate moderate humidity | Yes | Yes (with occasional misting) |
| Giant Canyon Isopods (Porcellio dilatatus) | Large, eat tough plant matter | No | Yes (arid-adapted) |
Start with 20–30 springtails and 10–15 isopods per 10 gallons of substrate. Introduce them after the substrate settles (1–2 weeks post-setup).
Choosing the Right Cleanup Crew
Consider the following factors when selecting your cleanup crew:
- Humidity tolerance: Dwarf white isopods require high humidity and will desiccate in arid setups. Powder blues are more adaptable but still need occasional moisture.
- Size and activity: Giant canyon isopods are large and may disturb small plants or burrow aggressively. Dwarf whites are tiny and less obtrusive.
- Breeding rate: Powder blues breed quickly, which is great for establishing a population but can lead to overpopulation if too many are added.
How to Introduce Cleanup Crew
- Wait at least 1–2 weeks after setting up the substrate to allow it to settle and for any initial mold blooms to appear (which provide food).
- Place the springtails and isopods in small groups on the soil surface, preferably near leaf litter or a moist area.
- Provide a small piece of fruit or vegetable (e.g., a slice of cucumber) initially to give them a food source while they establish.
- Monitor for the first few days to ensure they are active and not dying.
Maintenance and Troubleshooting
Once your bioactive substrate is established, it requires regular but manageable maintenance.
Watering
For tropical: Mist daily to keep substrate moist but not soggy. Drain excess water from the drainage layer weekly. For arid: Mist lightly once a week or when humidity drops below 30%. Never let arid substrate stay wet.
How to Check Moisture Levels:
- Use a moisture meter (available at garden stores) to measure soil moisture at different depths.
- For tropical, the soil should feel like a damp sponge – moist but not dripping when squeezed.
- For arid, the soil should be dry to the touch at the surface, with slight moisture deeper down (if any).
Cleaning
Spot-clean visible waste with tongs. Replace top 1–2 inches of substrate every 6–12 months. Stir the substrate gently to aerate and redistribute moisture.
Step-by-Step Spot Cleaning:
- Use a pair of tongs to remove any large feces, shed skin, or uneaten food.
- If you see mold on the surface, remove the affected soil and replace with fresh mix.
- Stir the top 1–2 inches of soil with a small hand trowel to aerate and prevent compaction.
Common Issues
- Mold blooms: Increase springtail population; reduce misting.
- Isopod die-off: Check for overwatering (tropical) or underwatering (arid). Add leaf litter for food.
- Fungus gnats: Reduce moisture; add a layer of sand on top. Use yellow sticky traps.
Detailed Troubleshooting:
Mold Blooms
Mold is a normal part of a bioactive substrate, especially in the first few weeks. However, excessive mold can harm your reptile. If you see a thick layer of mold:
- Add more springtails – they will consume the mold.
- Reduce misting frequency for a few days to allow the soil to dry slightly.
- Improve ventilation by increasing airflow (e.g., use a small fan or open vents).
Isopod Die-Off
If you notice dead or dying isopods, check the following:
- Moisture: For tropical, the soil may be too wet – reduce misting and improve drainage. For arid, the soil may be too dry – increase misting slightly and add a moist hide.
- Food: Ensure there is enough leaf litter and organic matter. Add more if it has been consumed.
- Calcium: If isopods appear sluggish, add crushed eggshells or cuttlebone to the substrate.
Fungus Gnats
Fungus gnats are often a sign of overwatering. To eliminate them:
- Allow the top inch of soil to dry out completely.
- Add a 0.5-inch layer of play sand on top of the soil to prevent adults from laying eggs.
- Use yellow sticky traps to catch adult gnats.
Comparison: Tropical vs. Arid Bioactive Substrates
| Feature | Tropical | Arid |
|---|---|---|
| Primary soil base | Topsoil + peat/coco coir | Topsoil + sand |
| Drainage layer | 1–2 inches LECA | 0.5–1 inch gravel (optional) |
| Humidity | 70–90% | 20–40% |
| Cleanup crew | Springtails + dwarf isopods | Springtails + arid-adapted isopods |
| Misting frequency | Daily | Weekly |
| Leaf litter amount | Thick layer (2–3 inches) | Thin layer (0.5–1 inch) |
This table summarizes the key differences. Always tailor your setup to the specific needs of your reptile species, as some may have unique requirements.
Step-by-Step Setup Guide
Here is a complete walkthrough from empty tank to established bioactive vivarium.
Materials You'll Need
- Vivarium tank with screen top or ventilation
- LECA or hydroton (tropical) or coarse gravel (arid)
- Fiberglass window screen or landscape fabric
- Organic topsoil (no fertilizers or perlite)
- Peat moss or coco coir (tropical only)
- Sphagnum moss (tropical only)
- Horticultural sand or fine pumice (tropical) or play sand and decomposed granite (arid)
- Leaf litter (oak, magnolia, or other reptile-safe leaves)
- Activated carbon (optional)
- Cleanup crew (springtails, isopods)
- Spray bottle or mister
- Tongs for spot cleaning
Step-by-Step Instructions
- Prepare the tank: Clean and disinfect the vivarium. Rinse thoroughly to remove any residues.
- Add the drainage layer: Spread LECA or gravel evenly across the bottom to the recommended depth.
- Install the separator: Cut the screen or fabric to size and lay it over the drainage layer, ensuring it covers the entire area.
- Add optional carbon: Sprinkle a thin layer of activated carbon over the screen.
- Add the soil mix: Pour your prepared soil mix on top of the screen to a depth of 2–4 inches (or more for burrowing species).
- Add leaf litter: Spread the appropriate amount of leaf litter over the soil surface.
- Wait and observe: Let the substrate settle for 1–2 weeks. During this time, monitor moisture levels and adjust as needed.
- Introduce cleanup crew: After the settling period, add springtails and isopods. Provide a small food source initially.
- Add plants (optional): Plant live plants after the cleanup crew is established. Choose species that match your humidity and light conditions.
- Maintain: Follow the maintenance schedule outlined above.
Common Setup Mistakes
- Not waiting long enough: Introducing cleanup crew too early can result in die-off due to unstable conditions.
- Using the wrong soil: Potting soil with fertilizers or perlite is toxic. Always use organic, additive-free topsoil.
- Overcrowding the cleanup crew: More isopods = more waste. Start small and let them breed.
- Ignoring ventilation: Stagnant air promotes mold. Use screen tops or vent fans.
- Mixing tropical and arid species in same substrate: Keep humidity-specific setups separate.
Pitfalls to Watch For
- Using potting soil with fertilizers: Toxic to cleanup crew and reptiles. Always use organic, additive-free topsoil.
- Skipping the drainage layer in tropical setups: Leads to anaerobic conditions and root rot.
- Overcrowding cleanup crew: More isopods = more waste. Start small and let them breed.
- Ignoring ventilation: Stagnant air promotes mold. Use screen tops or vent fans.
- Mixing tropical and arid species in same substrate: Keep humidity-specific setups separate.
These pitfalls are the most common reasons why bioactive substrates fail. By avoiding them, you'll set your vivarium up for long-term success.
Final Tips for Long-Term Success
Monitor substrate pH (ideal 6.0–7.5 for most setups). Add crushed eggshells or cuttlebone for calcium if isopods are sluggish. Replace leaf litter every 3–6 months to provide fresh food. With proper setup, a bioactive substrate can last 2–5 years without full replacement.
Additional Tips:
- Keep a journal: Track misting, cleanings, and cleanup crew population to spot problems early.
- Quarantine new plants: Before adding plants, rinse them and inspect for pests or chemicals.
- Use dechlorinated water: Chlorine and chloramine can harm your cleanup crew. Use a dechlorinator or let water sit for 24 hours.
- Be patient: It can take 3–6 months for a bioactive substrate to fully stabilize. Don't panic if you see fluctuations in the beginning.
Frequently Asked Questions
How long does a bioactive substrate last?
With proper maintenance, a bioactive substrate can last 2–5 years without full replacement. You should replace the top 1–2 inches of substrate every 6–12 months and add fresh leaf litter every 3–6 months to provide food for the cleanup crew.
Can I use regular potting soil for a bioactive substrate?
No, you should never use potting soil with fertilizers or perlite, as these are toxic to cleanup crew and reptiles. Always use organic, additive-free topsoil. Check the label to ensure it contains no added nutrients, wetting agents, or pesticides.
Why are my isopods dying?
Isopod die-off is usually caused by incorrect moisture levels. For tropical setups, the substrate may be too wet – reduce misting and improve drainage. For arid setups, the substrate may be too dry – increase misting slightly and add a moist hide. Also, ensure there is enough leaf litter for food and add crushed eggshells or cuttlebone for calcium if isopods appear sluggish.
Do I need a drainage layer in an arid bioactive setup?
For arid vivariums, you can skip the drainage layer or use a thin layer of coarse gravel (0.5–1 inch) if you occasionally mist. The key is to ensure the substrate drains quickly and never stays wet. If you rarely mist and the substrate is dry, a drainage layer is unnecessary.
Related Reading
- Best Reptile Substrate: 10 Options Compared by Species — Compare 10 substrates across species to pick the best base for your bioactive mix.
- Reptile Substrate by Species: Complete Comparison Table — Find the ideal substrate for your specific reptile species in this handy table.
- Loose Substrate & Impaction Risk for Reptiles — Learn how to minimize impaction risks when using loose, bioactive-style substrates.
- Reptile UVB Lighting Guide: Ferguson Zones & Bulb Selection — Discover proper UVB lighting to keep your bioactive setup's inhabitants healthy.
- Reptile Vitamins & Supplements: Calcium With or Without D3 — Understand calcium and D3 supplementation basics for reptiles in bioactive enclosures.
Check optimal temps, calculate feeding, and find your perfect species match.
References
- Arcadia Reptile (2023). Bioactive Vivarium Setup Guide. Arcadia Products.
- Repashy Ventures (2022). Cleanup Crew Species Guide. Repashy.
- NeHerp (2021). Isopod Care and Breeding. New England Herpetological Society.
🐾 Join the Community
See how other keepers set up their enclosures, ask questions, and share your experience.
🛠️ Apply What You Learned
Check optimal temps, calculate feeding schedules, and get calcium dosage — all personalized for your species.
Comments