Tarantula Molting: Premolt Signs & Post-Molt Care
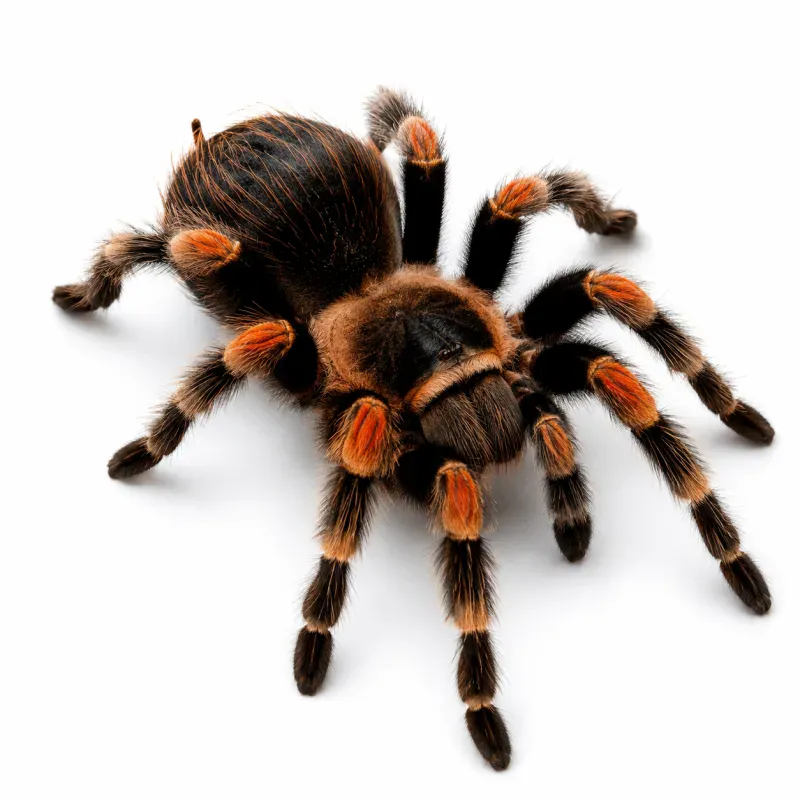
Understanding Molting in Tarantulas
Molting is a critical physiological process where a tarantula sheds its old exoskeleton to grow, regenerate lost limbs, and replace damaged sensory organs. For tarantula keepers, understanding the molting cycle—from premolt signs to post-molt care—is essential for ensuring your spider’s health and longevity. This guide covers every stage of the molt, including how to identify premolt, what happens during the actual shedding, and how to care for your tarantula afterward. We also address common molting problems and how to respond to bad molts.
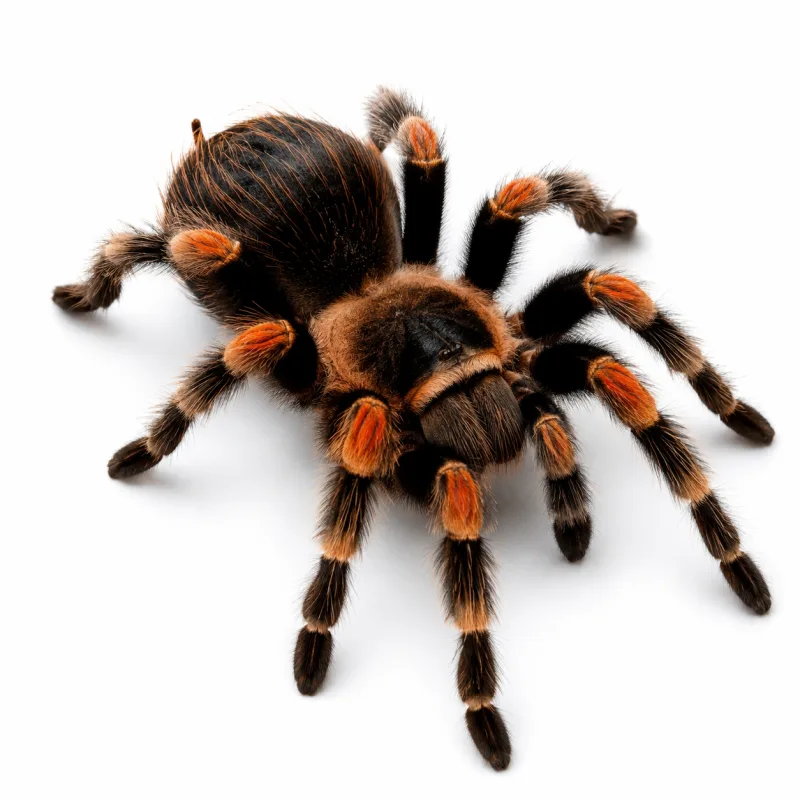
Molting is not just about growth; it's a full-body renewal. The new exoskeleton allows the tarantula to replace worn-out setae (sensory hairs), regenerate missing legs or pedipalps, and even repair minor damage to its fangs. For juveniles, molting happens frequently as they rapidly grow, while adults molt less often, primarily for regeneration or reproductive readiness in females. Understanding the nuances of each stage will help you provide the best care and avoid common pitfalls.
Premolt Signs: How to Tell Your Tarantula Is About to Molt
Recognizing premolt is the first step to successful molting. During this phase, your tarantula’s body prepares for the big event. Look for these key indicators:
- Darkening of the abdomen: The bald spot on the abdomen turns dark gray or black as the new exoskeleton forms underneath.
- Loss of appetite: Tarantulas often refuse food for days to weeks before a molt. Do not force-feed.
- Lethargy and reduced activity: The spider may stay in its hide or become less responsive.
- Web building: Many species spin a thick molting mat or web on the ground to lie on during the process.
- Increased drinking: Some tarantulas drink more water to hydrate before molting.
- Flipping onto back: In the final hours, a tarantula may lie on its back—this is normal and signals imminent molting.
Premolt duration varies by age and species. Juveniles may show signs for 1–2 weeks, while adults can take several weeks. During this time, maintain optimal humidity and temperature, and do not disturb the tarantula.
Detailed Premolt Timeline
While every tarantula is unique, most follow a predictable progression:
| Phase | Timeline | Signs |
|---|---|---|
| Early Premolt | 1–3 weeks before molt | Loss of appetite, slight dulling of colors, increased hiding |
| Mid Premolt | 3–7 days before | Abdomen darkening (especially on bald spot), lethargy, web mat spinning |
| Late Premolt | 24–48 hours before | Heavy webbing, excessive drinking, may flip onto back |
| Immediate | Minutes to hours | Lying on back or side, legs curled, no movement |
Keep a journal or log of these signs to predict future molts, especially for adults that molt infrequently. This helps you prepare the enclosure and avoid unnecessary stress.
The Molting Process: Step by Step
When a tarantula begins to molt, it typically flips onto its back (or sometimes its side) and remains still for several hours to a day. Here’s what happens:
- Hydration and softening: The tarantula secretes a fluid between the old and new exoskeleton to soften the old shell.
- Old exoskeleton splits: The carapace (head) area cracks open, usually along the sides of the cephalothorax.
- Extraction: The tarantula slowly pulls its legs, pedipalps, and chelicerae out of the old skin. This is the most delicate phase and can take 30 minutes to several hours.
- Rest and expansion: After emerging, the tarantula rests on its back or side while the new exoskeleton hardens. The abdomen expands as the spider pumps hemolymph (blood) into its new body.
- Righting itself: Once the new shell is firm enough, the tarantula flips over and begins to stretch.
Important: Never touch or disturb a molting tarantula. Even slight vibrations can cause fatal stress or a stuck molt.
What Happens Inside: The Physiology of Molt
Before the visible split, the tarantula's body undergoes complex changes. The old exoskeleton separates from the new one due to enzymes and hemolymph pressure. The new exoskeleton is initially soft and wrinkled, allowing the spider to expand its body. The fangs are also replaced—they are soft and white immediately after molt, darkening over a few days. This is why feeding too soon can cause permanent damage.
Duration of Molt by Age
| Age Group | Molt Duration | Hardening Time |
|---|---|---|
| Spiderling (1–2 cm) | 15–30 minutes | 2–4 days |
| Juvenile (2–5 cm) | 1–3 hours | 5–7 days |
| Sub-adult (5–8 cm) | 3–6 hours | 7–10 days |
| Adult (8+ cm) | 6–12 hours | 10–14 days |
These are general guidelines—some species may take longer, especially if conditions are suboptimal. Always err on the side of patience.
Post-Molt Care: Ensuring a Healthy Recovery
After molting, your tarantula is extremely vulnerable. Its new exoskeleton is soft and fragile, and it needs time to harden fully. Follow these guidelines:
- Do not feed for 7–14 days: The fangs are soft and can bend or break if the spider tries to eat. Wait until the tarantula has fully hardened and begins to show interest in food.
- Maintain humidity: Higher humidity helps the exoskeleton harden properly. Mist lightly if needed, but avoid wet substrate.
- Keep the enclosure quiet: No handling, loud noises, or bright lights. The spider may be stressed and defensive.
- Provide a water dish: Ensure fresh water is available, but remove any food items that might attract pests.
- Monitor for complications: Check for stuck pieces, especially on legs or fangs. If the tarantula cannot free itself, intervention may be needed (see troubleshooting below).
Post-molt, the tarantula will often eat its old exoskeleton to reclaim nutrients. This is normal and beneficial—do not remove it unless it becomes moldy.
Step-by-Step Post-Molt Checklist
- Day 0–1: Leave the tarantula alone. Do not open the enclosure unless absolutely necessary. Ensure the water dish is full (if accessible without disturbing).
- Day 2–3: Check for any stuck shed. If the tarantula is still on its back, do not touch—it may still be hardening.
- Day 4–7: The exoskeleton should be noticeably firmer. You may gently remove the old molt if it's not being eaten, but leave it if the spider is still using it.
- Day 7–10: Offer a small, pre-killed prey item (like a cricket leg or a small roach). If the tarantula shows no interest within 24 hours, remove it and wait another 3–5 days.
- Day 14+: Resume regular feeding schedule. Handle only if the tarantula is calm and the exoskeleton is fully hardened (typically after 2–3 weeks).
Nutritional Needs After Molt
The old exoskeleton provides calcium and other minerals. If the tarantula doesn't eat it (some species don't), you can supplement by dusting prey with a calcium-free vitamin powder (reptile-safe) after the first few feedings. However, most tarantulas get adequate nutrition from their regular diet of insects.
Troubleshooting Bad Molts: What to Do When Things Go Wrong
Even with perfect care, molts can fail. Common problems include stuck legs, incomplete shedding, or death during the process. Here’s how to recognize and respond:
| Problem | Cause | Solution |
|---|---|---|
| Stuck leg or pedipalp | Low humidity, dehydration, or old age | Gently use a soft paintbrush or tweezers to moisten the area with water. Do not pull—allow the tarantula to work it free. If it doesn't release in 12 hours, consider a humidity box. |
| Incomplete molt (partially shed) | Low humidity or nutritional deficiency | Place the tarantula in a humid container (e.g., a deli cup with damp paper towels) for 24–48 hours. Do not force the molt. |
| Fangs not hardened | Premature feeding or handling | Wait longer before offering food (up to 3 weeks). If fangs are deformed, consult a veterinarian. |
| Death during molt | Stress, injury, or underlying illness | Often unavoidable. Ensure enclosure conditions are optimal for future molts. |
| Abdomen rupture | Overhydration or trauma | Immediate veterinary care is needed. Minor leaks may be sealed with cornstarch, but prognosis is poor. |
If you suspect a bad molt, intervene only if the tarantula is clearly stuck and cannot free itself after 24 hours. In most cases, patience is the best approach.
How to Create a Humidity Box
A humidity box is a simple rescue tool for stuck molts. Use a small plastic container with ventilation holes, line it with damp (not wet) paper towels, and place the tarantula inside. Keep the box in a warm, quiet area. The increased humidity softens the old exoskeleton, making it easier for the tarantula to shed. Monitor for 24–48 hours; if no progress, consult a vet.
When to Intervene vs. When to Wait
Most molting issues resolve on their own. Only intervene if:
- The tarantula has been stuck for more than 24 hours and is clearly struggling (e.g., twitching legs, excessive movement).
- A limb is trapped and the spider is bleeding (hemolymph) from the site.
- The molt has been partially shed for over 48 hours with no progress.
In all other cases, resist the urge to help—your intervention can cause more harm than good.
Enclosure Setup for Molting Success
Proper enclosure conditions significantly reduce molting risks. Here’s what to focus on:
- Substrate: Use a mix of coconut fiber, peat moss, and vermiculite to retain moisture. Depth should be at least 4–6 inches for burrowing species.
- Humidity: Maintain 60–80% humidity during premolt and post-molt. Use a hygrometer to monitor.
- Temperature: Keep the enclosure at 75–85°F (24–29°C) with a gentle heat mat on the side (never on the bottom).
- Hide: Provide a dark, secure hide where the tarantula can molt undisturbed.
- Water dish: Always have a shallow water dish available, but ensure it’s escape-proof.
Avoid using loose substrates like sand or wood chips, as they can cause impaction or dehydration.
Substrate Moisture Gradient
Create a moisture gradient in the enclosure: one side slightly damp, the other drier. This allows the tarantula to choose its preferred humidity level, which is especially important during molting. For burrowing species, the substrate should be deep enough to allow tunneling, which provides a stable microclimate.
Temperature Considerations
Fluctuations in temperature can stress a molting tarantula. Use a thermostat to keep the heat mat at a consistent temperature. Avoid heat lamps, as they dry out the enclosure and can cause burns. Place the heat mat on the side of the enclosure, never the bottom, to mimic natural heat from the sun warming the ground.
Molting Problems and Solutions: Common Mistakes to Avoid
Even experienced keepers make errors. Avoid these pitfalls:
- Handling during premolt or molt: This is the number one cause of stress and failed molts.
- Feeding too soon: Always wait at least 7–10 days post-molt before offering food.
- Removing the old exoskeleton: The tarantula needs it for nutrients and to harden its new shell. Leave it for 2–3 days.
- Over-misting: Excess moisture can lead to mold or bacterial infections. Mist lightly, not heavily.
- Ignoring premolt signs: If your tarantula stops eating and becomes lethargic, don’t assume it’s sick—it’s likely preparing to molt.
By understanding these common mistakes, you can create a safer environment for your tarantula’s molting cycle.
Mistake 1: Handling Too Early
Even after the exoskeleton appears hard, the internal tissues may still be delicate. Handling within the first week post-molt can cause internal injuries or stress. Wait at least 2–3 weeks, and then only handle if the tarantula is calm and accustomed to it.
Mistake 2: Overfeeding After Molt
Once the tarantula starts eating again, it may be ravenous. However, overfeeding can lead to obesity and future molting difficulties. Stick to a regular feeding schedule appropriate for its age and species.
Mistake 3: Using the Wrong Substrate
Sand, wood chips, and gravel do not retain moisture well and can cause injury during molting. Always use a substrate that holds humidity but is not waterlogged, like coconut fiber or a peat-vermiculite mix.
Mistake 4: Disturbing the Molting Mat
Some species spin a thick web mat to molt on. If you clean the enclosure and remove this mat, the tarantula may not have a stable surface to shed. Leave the mat in place until after the molt is complete.
Mistake 5: Ignoring Species-Specific Needs
Arboreal species (like Avicularia) need vertical cork bark and higher humidity, while terrestrial species (like Brachypelma) need more substrate depth. Research your species' natural habitat to provide the right conditions for molting.
Step-by-Step: Preparing Your Enclosure for Molt
Getting the enclosure ready before your tarantula enters premolt can make a huge difference. Follow this checklist to ensure a smooth molt:
- Check humidity: Use a hygrometer to confirm the enclosure is within the 60–80% range. If it's low, lightly mist the substrate (not the tarantula) a few days before the expected molt.
- Verify temperature: Ensure the heat mat is working and set to 75–85°F (24–29°C). Avoid sudden temperature swings.
- Remove live prey: Any crickets or roaches left in the enclosure can stress or even attack a molting tarantula. Remove them at the first sign of premolt.
- Top up the water dish: A full, clean water dish is essential for hydration during and after the molt.
- Minimize disturbances: Plan to avoid opening the enclosure unless absolutely necessary. Let family members know not to tap or shake the tank.
- Prepare a humidity box (optional): Have a small container with damp paper towels ready in case of a stuck molt emergency.
Taking these steps in advance reduces stress and gives your tarantula the best chance of a successful molt.
Seasonal Molting Care: Adjusting for Weather Changes
Tarantulas are sensitive to seasonal shifts, which can affect their molting cycles. Here’s how to adapt your care throughout the year:
| Season | Key Considerations | Adjustments |
|---|---|---|
| Spring | Rising temperatures and humidity; many species begin active growth. | Monitor humidity closely; increase misting if the enclosure dries out. Expect more frequent molts in juveniles. |
| Summer | High heat and potential for overheating; humidity may fluctuate. | Keep the enclosure out of direct sunlight. Ventilate well to prevent stagnant, overly humid air. Check water dish daily. |
| Autumn | Cooling temperatures; some species may slow down. | Gradually reduce feeding if activity decreases. Ensure the heat mat maintains the correct temperature as ambient temps drop. |
| Winter | Dry indoor air from heating; risk of dehydration. | Increase misting frequency slightly, but avoid waterlogging. Use a hygrometer to keep humidity in the 60–80% range. Keep the enclosure away from cold drafts. |
Seasonal adjustments help mimic your tarantula's natural environment, reducing stress and promoting healthier molts.
Cost Breakdown: Budgeting for Molting Supplies
Molting doesn't require expensive equipment, but having the right supplies on hand can save you from emergencies. Here's a typical cost breakdown:
| Item | Estimated Cost | Purpose |
|---|---|---|
| Hygrometer | $10–$20 | Monitor humidity levels accurately. |
| Thermometer | $5–$15 | Ensure temperature stays within 75–85°F. |
| Heat mat with thermostat | $20–$40 | Provide consistent, safe heat. |
| Coconut fiber substrate | $5–$10 per brick | Retain moisture; safe for burrowing. |
| Spray bottle (mist) | $5–$10 | Light misting for humidity control. |
| Soft paintbrush | $2–$5 | Gently assist stuck molts. |
| Deli cup (humidity box) | $1–$3 | Emergency rescue tool for bad molts. |
Total initial investment: $50–$100 for essential tools. Most items last for years, making this a one-time cost for ongoing molting support.
Frequently Asked Questions
How often do tarantulas molt?
Juveniles molt every 2–4 weeks, while adults may molt once a year or less. Older females may go years between molts. The frequency depends on age, species, and environmental conditions.
Can I handle my tarantula after a molt?
No. Wait at least 2–3 weeks after the molt, and only handle if the tarantula is calm and the new exoskeleton is fully hardened. Handling too early can cause injury or stress.
What if my tarantula doesn’t flip over during molt?
Some species molt on their side or even upright. As long as they are shedding, it’s fine. The position is not a cause for concern; the key is that the molt proceeds normally.
Should I assist a stuck molt?
Only if the tarantula is clearly stuck for more than 24 hours and shows signs of distress (e.g., twitching). Use a humidity box or a damp paintbrush to help, but never pull. If it doesn't improve in 48 hours, consult a veterinarian.
What should I do if my tarantula hasn't eaten for weeks before a molt?
Loss of appetite is a normal premolt sign. Do not force-feed. Ensure fresh water is available and maintain proper humidity and temperature. The tarantula will resume eating after the molt and its exoskeleton hardens.
Can I remove the old exoskeleton after my tarantula molts?
Leave the old exoskeleton in the enclosure for 2–3 days, as the tarantula may eat it for nutrients. Remove it only if it becomes moldy or after several days if left uneaten.
How do I know if my tarantula is molting or dead?
A molting tarantula may lie on its back with legs curled, but it will respond to gentle air movement or vibration. Dead tarantulas often have legs curled under the body and no response. If unsure, wait a few hours—molting can take up to 12 hours.
With proper care and observation, most tarantulas molt successfully. Remember: patience is key. Your spider knows what to do—your job is to provide the right conditions and step back.
Check optimal temps, calculate feeding, and find your perfect species match.
References
- Schultz, S. & Schultz, M. (2009). The Tarantula Keeper's Guide. Barron's Educational Series.
- Hillyard, P. (2004). The Private Life of Spiders. Princeton University Press.
- Baxter, R. (2002). Tarantulas: A Complete Guide. TFH Publications.
🐾 Join the Community
See how other keepers set up their enclosures, ask questions, and share your experience.
🛠️ Apply What You Learned
Check optimal temps, calculate feeding schedules, and get calcium dosage — all personalized for your species.
Comments
No account needed — corrections, updates and questions are all welcome. For a full question with photos, the community Q&A is the better place.