How to Breed Dubia Roaches: Complete Guide
Introduction
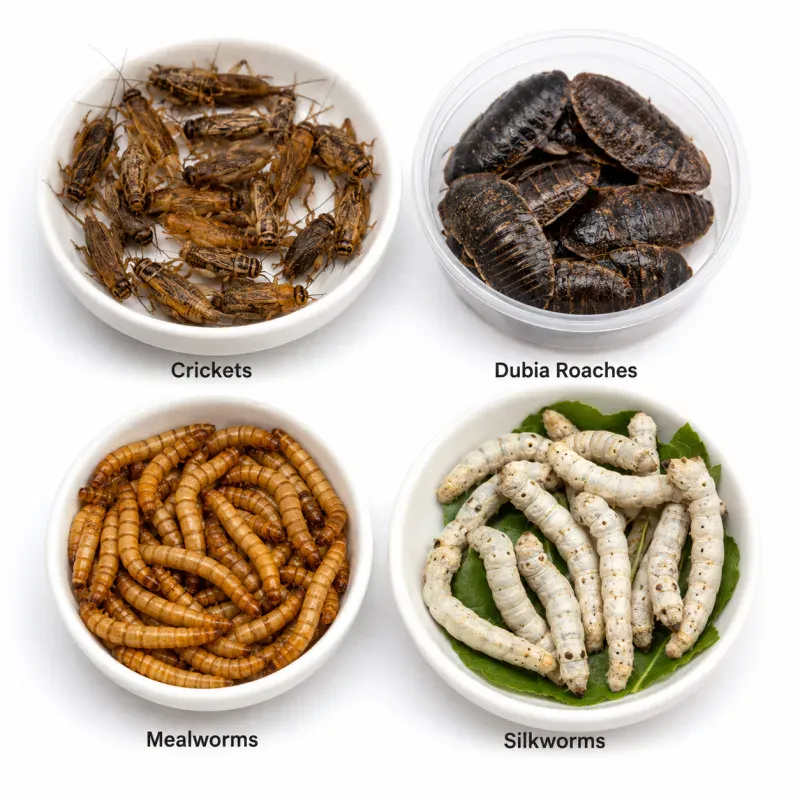
Dubia roaches (Blaptica dubia) are among the most popular feeder insects for reptiles, amphibians, and other insectivorous pets. They are highly nutritious, easy to maintain, and do not climb smooth surfaces or fly, making them safe and convenient. Breeding your own colony saves money and ensures a steady supply of appropriately sized feeders. This guide covers everything you need to start and maintain a successful dubia roach colony.
Whether you're a reptile hobbyist looking to cut feeder costs or a breeder needing a reliable food source, understanding the nuances of dubia roach husbandry is key. This expanded guide dives deeper into each aspect, offering step-by-step instructions, troubleshooting tips, and advanced strategies to maximize your colony's health and productivity.
Enclosure Setup
Bin Selection
Choose a smooth-sided plastic bin or glass terrarium with a tight-fitting lid. A 10–20 gallon bin is ideal for a starter colony of 50–100 roaches. Ensure the bin has ventilation — cut a large hole in the lid or sides and cover with fine mesh (metal or fiberglass window screen) to prevent escapes and allow airflow. Dubia roaches cannot climb smooth plastic or glass, so no lid sealant is needed.
Step-by-step bin setup:
- Select a bin with smooth, vertical sides (avoid textured plastic that roaches can grip).
- Cut a 6x6-inch hole in the lid or upper side wall using a utility knife or drill.
- Attach fine mesh (1mm or smaller) over the hole using silicone adhesive or hot glue. Ensure the mesh is taut and has no gaps.
- Wash the bin with mild soap and water, rinse thoroughly, and dry completely before adding substrate.
Comparison of bin types:
| Bin Type | Pros | Cons |
|---|---|---|
| Plastic storage bin | Inexpensive, easy to modify, smooth sides | Can warp under high heat; may need reinforcement |
| Glass terrarium | Durable, easy to clean, good visibility | Heavy, more expensive, can break |
| Rubbermaid-style bin | Sturdy, stackable, good for large colonies | Often have textured bottoms; need to ensure smooth sides |
Substrate and Hides
Provide a thin layer of substrate (1–2 inches) such as coconut coir, peat moss, or paper towels. Egg cartons, cardboard tubes, and cork bark offer essential hiding spots and climbing surfaces. Arrange them vertically to maximize surface area. The colony will spend most of its time on these hides.
How to arrange hides:
- Stack egg cartons in a grid pattern, leaving gaps for roaches to move.
- Place cardboard tubes vertically or horizontally to create tunnels.
- Use cork bark slabs leaning against the bin walls for additional climbing areas.
- Ensure hides are stable and don't collapse under the weight of the colony.
Replace cardboard hides when they become soiled or moldy. Egg cartons are cheap and disposable, making them ideal for easy cleaning.
Feeding and Water Stations
Use a shallow dish for dry food and a separate dish for water gel crystals or fruits/vegetables (see Diet/Feeding section). Avoid standing water, as roaches can drown.
Feeding station setup:
- Use a small ceramic or plastic dish with low sides (e.g., a bottle cap or petri dish) for dry food.
- Place the dish on a flat surface within the bin, away from the heat source to prevent food from spoiling.
- For water, use a shallow dish filled with water gel crystals or a dish with pebbles and water (ensure pebbles are large enough that roaches can't swallow them).
- Clean and refill water dishes weekly to prevent bacterial growth.
Heating and Lighting
Temperature Requirements
Dubia roaches thrive at 85–95°F (29–35°C). Use a heat mat, heat tape, or a ceramic heat emitter attached to a thermostat to maintain consistent temperatures. Place the heat source on one side of the bin to create a thermal gradient. Temperatures below 70°F slow reproduction; above 100°F can be lethal.
Choosing a heat source:
| Heat Source | Pros | Cons |
|---|---|---|
| Heat mat (under-tank) | Easy to install, low cost | May not heat thick substrate evenly; can overheat if not regulated |
| Heat tape | Flexible, can be cut to size, good for multiple bins | Requires thermostat; can create hot spots |
| Ceramic heat emitter | Provides ambient heat, good for larger bins | Requires a fixture; can dry out the air |
Temperature monitoring:
- Place a digital thermometer with a probe on the warm side and another on the cool side to monitor the gradient.
- Use a thermostat to automatically regulate the heat source, preventing dangerous spikes.
- Check temperatures daily, especially during seasonal changes.
Troubleshooting temperature issues:
- If the bin is too cold, move the heat source closer or add a second heat mat on the opposite side (but avoid creating a hot zone above 95°F).
- If the bin is too hot, increase ventilation, move the heat source away, or use a lower wattage bulb.
- In winter, room temperatures may drop; consider insulating the bin with foam boards or towels.
Lighting
No special lighting is required. Dubia roaches are nocturnal and prefer darkness. A 12-hour light/dark cycle is fine, but constant darkness is acceptable. Avoid bright lights that may stress the colony.
If you use lighting for viewing, choose a low-wattage red or blue bulb that mimics moonlight. Keep lighting minimal and consistent to avoid disrupting their natural behavior.
Humidity
Maintain humidity at 40–60%. This can be achieved by misting the substrate lightly once or twice a week, or by placing a small dish of water crystals (not standing water). High humidity (above 70%) promotes mold and mite infestations. Low humidity (below 30%) can cause dehydration and molting issues. Use a hygrometer to monitor levels.
How to manage humidity:
- Place a hygrometer inside the bin, away from the water source, for accurate readings.
- Mist the substrate lightly with a spray bottle, avoiding direct spraying on roaches.
- If humidity is too high, increase ventilation by adding more mesh holes or using a small fan (low speed) near the bin.
- If humidity is too low, add a larger water dish or mist more frequently.
Seasonal adjustments:
- In summer, humidity may rise; reduce misting and ensure good airflow.
- In winter, indoor heating can dry the air; mist more often or place a humidifier nearby.
Diet and Feeding
Staple Foods
Provide a high-protein dry feed such as roach chow (commercial blends), ground chicken feed, or a mix of oats, wheat bran, and fish flakes. Supplement with fresh fruits and vegetables (e.g., carrots, apples, oranges, leafy greens) for moisture and vitamins. Avoid high-moisture foods like watermelon or cucumber in excess, as they can raise humidity too much.
Sample dry food mix:
- 50% ground chicken feed (or roach chow)
- 30% oats or wheat bran
- 10% fish flakes (for protein)
- 10% dry milk powder (optional, for calcium)
Mix thoroughly and store in an airtight container. Offer the dry mix in a shallow dish, refilling as needed.
Fresh produce options:
- Leafy greens: kale, collard greens, romaine lettuce (avoid iceberg)
- Root vegetables: carrots, sweet potatoes (grated)
- Fruits: apples, oranges, bananas (in moderation)
- Other: squash, zucchini, peas
Always wash produce thoroughly to remove pesticides, as toxins can harm roaches.
Water Source
Use water gel crystals (e.g., Fluker’s Cricket Quencher) or a shallow dish with pebbles to prevent drowning. Change water sources weekly. Do not use open water dishes without a substrate barrier.
Water gel crystals setup:
- Place dry crystals in a shallow dish.
- Add water according to package instructions (usually a few tablespoons per teaspoon of crystals).
- Wait for them to absorb water and expand into a gel.
- Place the dish in the bin, away from the heat source to prevent evaporation.
Alternatively, use a shallow dish with a layer of pebbles and add water until it just reaches the top of the pebbles. This provides a drinking surface without drowning risk.
Feeding Schedule
Offer dry food continuously (refill as needed). Provide fresh produce 2–3 times per week, removing uneaten portions after 24 hours to prevent mold. A well-fed colony reproduces faster and produces healthier feeders.
Weekly feeding plan:
- Monday: Fresh produce (e.g., carrots and leafy greens). Remove after 24 hours.
- Wednesday: Fresh produce (e.g., apple slices). Remove after 24 hours.
- Friday: Fresh produce (e.g., orange slices). Remove after 24 hours.
- Daily: Check dry food dish and refill as needed.
During breeding periods, increase protein and fresh produce to support egg production.
Harvesting and Colony Management
Harvesting Methods
To harvest roaches for feeding, gently shake egg cartons over a collection bin or use forceps. Separate nymphs (small roaches) from adults by size. Use a sieve or mesh colander to sort by size — for example, 1/4-inch mesh for small nymphs, 1/2-inch for medium, and 3/4-inch for large. Return any roaches too small for your pet to the colony.
Step-by-step harvesting:
- Remove egg cartons from the bin one at a time.
- Tap the carton over a large collection bin to dislodge roaches.
- Use a soft brush to gently sweep off any clinging roaches.
- Place the collected roaches into a sieve or colander with the desired mesh size.
- Shake gently to separate smaller roaches through the mesh.
- Collect the appropriately sized roaches for feeding.
- Return the remaining roaches to the colony.
Sorting table:
| Mesh Size | Roach Size | Suitable for |
|---|---|---|
| 1/4 inch | Small nymphs (1/8–1/4 inch) | Small reptiles, amphibians, baby mantises |
| 1/2 inch | Medium nymphs (1/4–1/2 inch) | Juvenile reptiles, small birds |
| 3/4 inch | Large nymphs (1/2–3/4 inch) | Adult reptiles, larger amphibians |
| 1 inch | Adult roaches (3/4 inch and up) | Large reptiles, monitors, tegus |
Use forceps for picking out specific roaches if you need individual sizes.
Colony Growth and Culling
Expect a colony to double every 2–3 months under optimal conditions. Remove dead roaches and frass (droppings) weekly to prevent disease. If the colony becomes overcrowded, split it into a second bin or sell/give away excess. Cull any deformed, sick, or slow-moving roaches.
Signs of overcrowding:
- Roaches piling up on hides excessively
- Increased mortality or stress
- Slower growth rates
- Foul odor from frass buildup
How to split a colony:
- Prepare a new bin with fresh substrate and hides, and set it to the same temperature and humidity.
- Transfer about 30–40% of the roaches, including a mix of adults and nymphs, to the new bin.
- Ensure both bins have adequate food and water.
- Monitor both bins closely for a week to ensure they adjust.
Culling guidelines:
- Remove any roaches with visible deformities (e.g., missing legs, malformed wings).
- Remove roaches that are lethargic or unresponsive.
- Remove dead roaches immediately to prevent disease spread.
Common Health Issues and Troubleshooting
| Issue | Cause | Solution |
|---|---|---|
| Slow reproduction | Low temperature, poor diet, or small colony size | Increase heat to 85–95°F; provide high-protein food; start with 50+ roaches |
| Mold or mites | Excess moisture or decaying food | Reduce humidity; remove uneaten food; clean bin; use predatory mites if severe |
| Roaches dying | Overheating, dehydration, or toxins (e.g., pesticides in produce) | Check temperature; provide water crystals; wash produce thoroughly |
| Escapes | Gaps in lid or mesh tears | Seal all openings; replace damaged mesh; use smooth-sided bin |
| Stunted growth | Low protein or overcrowding | Increase protein in diet; split colony |
Additional troubleshooting tips:
- Ammonia smell: Indicates poor ventilation or excessive waste. Increase ventilation and clean the bin more frequently.
- Fungal infections: If roaches show white or fuzzy patches, isolate them and improve hygiene.
- Mite infestations: If predatory mites are used, ensure they are specific to grain mites and won't harm roaches.
- Dehydration signs: Wrinkled or shrunken roaches indicate lack of moisture. Provide water crystals immediately.
What to Avoid
- Using standing water: Roaches can drown; always use water crystals or a shallow dish with pebbles.
- Neglecting ventilation: Poor airflow leads to ammonia buildup and mold. Ensure mesh-covered ventilation holes.
- Overcrowding: A too-dense colony stresses roaches and slows growth. Provide ample hides and split if needed.
- Feeding only dry food: Lack of moisture causes dehydration. Always include fresh produce or water crystals.
- Ignoring temperature: Inconsistent or low heat halts reproduction. Use a thermostat and thermometer.
- Mixing with other roach species: Keep dubia separate to prevent competition and disease.
Common mistakes to avoid:
- Using a bin with textured sides that allow roaches to climb and escape.
- Placing the heat source directly under the bin without a thermostat, causing hot spots.
- Over-misting the substrate, leading to mold growth.
- Feeding citrus fruits in excess, which can be too acidic.
- Not washing produce, exposing roaches to pesticides.
Breeding Cycle
Understanding the dubia roach breeding cycle is crucial for maximizing production. Females produce oothecae (egg cases) that they carry internally until the nymphs hatch. Each ootheca contains 20–40 eggs. Nymphs undergo multiple molts over 4–6 months before reaching adulthood. Adult females live 12–18 months and produce about 25–30 nymphs per month under optimal conditions.
Detailed lifecycle:
- Egg stage: The female carries the ootheca internally for about 4 weeks before the eggs hatch.
- Nymph stage: Nymphs emerge as small white roaches and darken within hours. They molt 7–10 times over 4–6 months.
- Adult stage: Adults have fully developed wings (males) and are sexually mature. Males are smaller with wings; females are larger with wing pads.
Sexing dubia roaches:
| Characteristic | Male | Female |
|---|---|---|
| Size | Smaller (1.25 inches) | Larger (1.5 inches) |
| Wings | Full wings covering the body | Wing pads only, no full wings |
| Body shape | Slender | Broader, more rounded |
Optimizing Reproduction
To encourage breeding, maintain a sex ratio of roughly 1 male to 3–4 females. Ensure the temperature stays consistently at 85–95°F, as fluctuations can delay oothecae production. Provide a high-protein diet and fresh produce to support egg development. Remove any dead adults promptly to prevent disease.
Additional tips:
- Provide extra protein during breeding, such as fish flakes or dry cat food.
- Keep the colony undisturbed as much as possible; frequent handling can stress females and reduce reproduction.
- Monitor for oothecae production by observing females; they may appear swollen.
Advanced Tips
Automating Feeding and Water
For large colonies, consider using a gravity-fed water dispenser with a sponge or pebbles to prevent drowning. Similarly, a DIY dry food dispenser can reduce maintenance. Always monitor humidity when using automated systems.
How to build a gravity water dispenser:
- Use a small plastic bottle (e.g., 16 oz) and a shallow dish.
- Fill the bottle with water and invert it into the dish, ensuring the opening is submerged.
- Place a layer of pebbles in the dish to create a drinking surface.
- Refill the bottle as needed.
DIY dry food dispenser:
- Use a PVC pipe with a cap on one end and a small opening on the other.
- Fill the pipe with dry food and place it horizontally in the bin.
- Roaches can access the food through the opening, and the food stays dry.
Using Heat Cables
Heat cables can be run along the bottom of the bin to provide consistent bottom heat, which mimics the warm microclimate dubias prefer. Attach to a thermostat to avoid overheating.
Installation steps:
- Lay the heat cable in a zigzag pattern on the bottom of the bin.
- Secure it with tape or clips designed for heat cables.
- Connect to a thermostat and set the desired temperature.
- Place a thermometer probe on the substrate to verify temperatures.
Colony Splitting
When splitting a colony, move a portion of the roaches, including some adults and nymphs, to a new bin with fresh substrate and hides. Keep the original bin and new bin at the same temperature and humidity to reduce stress.
Best practices:
- Split during the evening when roaches are most active.
- Use a soft brush or spoon to transfer roaches gently.
- Ensure the new bin is fully set up before transferring.
- Monitor both bins for the first week to ensure they are eating and active.
Frequently Asked Questions
How long does it take for a dubia roach colony to establish?
Under optimal conditions (85–95°F, proper diet, and humidity 40–60%), a starter colony of 50–100 roaches can double every 2–3 months. It typically takes 4–6 months to have a steady supply of feeders, as nymphs reach adult size in that time.
What is the ideal sex ratio for breeding?
Maintain a ratio of 1 male to 3–4 females. This ensures females are adequately mated without excessive male competition or stress, which can slow reproduction.
Can dubia roaches climb or fly?
No, dubia roaches cannot climb smooth surfaces like plastic or glass, and they do not fly. This makes them safe to keep in smooth-sided bins without special lid sealants, though fine mesh ventilation is essential.
How often should I clean the colony?
Remove dead roaches and frass weekly to prevent disease and mold. Replace substrate every few months or when it becomes heavily soiled. Clean the bin with mild soap and water, ensuring it is dry before adding new substrate.
\n\nRelated Reading
\n- \n
- Feeder Insect Nutrition Guide: Crickets vs Dubia vs Worms — Compare nutritional value of feeder insects to optimize your dubia roach feeding. \n
- Reptile Vitamins & Supplements: Calcium With or Without D3 — Learn how to dust dubia roaches with proper calcium and vitamin supplements. \n
- Reptile UVB Lighting Guide: Ferguson Zones & Bulb Selection — Understand UVB requirements for reptiles that eat dubia roaches as staples. \n
- Bearded Dragon UVB Setup — Get specific UVB setup tips for bearded dragons, a common dubia roach feeder. \n
Check optimal temps, calculate feeding, and find your perfect species match.
References
- Mulder, J. (2020). The Dubia Roach Manual. Roach Press.
- Smith, A. (2019). Feeder Insect Breeding for Reptiles. Herp Publications.
🐾 Join the Community
See how other keepers set up their enclosures, ask questions, and share your experience.
🛠️ Apply What You Learned
Check optimal temps, calculate feeding schedules, and get calcium dosage — all personalized for your species.
Comments